Export to ArcGIS: Difference between revisions
No edit summary |
No edit summary |
||
| Line 18: | Line 18: | ||
Using the drop-down lists select the columns from the dictionary/database that you would like used for the latitude and longitude in ArcGIS. When finished click on the button titled "Send to ArcgGIS" to queue your export job. When the job has finished exporting to ArcGIS you will receive an email at which point you can log into your ArcGIS Online account and click on the menu option titled "Content". | Using the drop-down lists select the columns from the dictionary/database that you would like used for the latitude and longitude in ArcGIS. When finished click on the button titled "Send to ArcgGIS" to queue your export job. When the job has finished exporting to ArcGIS you will receive an email at which point you can log into your ArcGIS Online account and click on the menu option titled "Content". | ||
'''''If you have already exported the data to ArcGIS in the past then running the export again will update the previous map layer with the new data from Golden Retriever.''''' | |||
[[File:ArcGIS menu - content.png|thumb|none]] | [[File:ArcGIS menu - content.png|thumb|none]] | ||
| Line 29: | Line 31: | ||
Click on the name of the feature layer to open it. | Click on the name of the feature layer to open it. | ||
''If you are wanting to make a public map that you can share with your customer please continue with the instructions on the Create public map page.'' | ''If you are wanting to make a public map that you can share with your customer please continue with the instructions on the [[Create public map]] page.'' | ||
To view your data click on the button to "Open in Map Viewer". | To view your data click on the button to "Open in Map Viewer". | ||
| Line 38: | Line 40: | ||
[[File:ArcGIS style menu.png|thumb|none]] | [[File:ArcGIS style menu.png|thumb|none]] | ||
You should now see your data plotted on the map. You can click on a pole icon to bring up a pop-up of all your collected data. | |||
[[File:ArcGIS demo map.png|thumb|none]] | |||
Revision as of 20:29, 20 January 2020
In order to export your collected data to ArcGIS Online you must first sign up for your own ArcGIS account. You can create an account at the following link:
https://www.esri.com/en-us/arcgis/products/create-account
Once you have created an account you will need to add those credentials into your Golden Retriever account. You can do this by logging into the Admin portal and clicking on the menu option titled "ArcGIS settings". If you do not see this menu option then you are not an administrator for any Golden Retriever accounts.

The next screen will list all of the companies that you are an admin of. Choose the company you would like to change the ArcGIS credentials of from the list and click on the name. You will be shown a pop-up where you can enter your username and password.
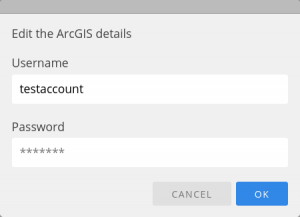
Note: Not only are your credentials stored in our secured database but your ArcGIS credentials are also encrypted with a unique key as well.
Now that you have stored your ArcGIS credentials into Golden Retriever anytime you open a dictionary/database that is assigned to your company you will find a new section located below the "Download data" section.
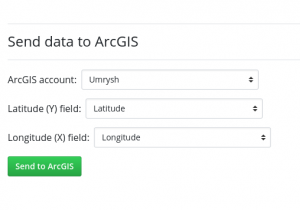
Using the drop-down lists select the columns from the dictionary/database that you would like used for the latitude and longitude in ArcGIS. When finished click on the button titled "Send to ArcgGIS" to queue your export job. When the job has finished exporting to ArcGIS you will receive an email at which point you can log into your ArcGIS Online account and click on the menu option titled "Content".
If you have already exported the data to ArcGIS in the past then running the export again will update the previous map layer with the new data from Golden Retriever.

You will then find a sub-folder in your account titled "Golden Retriever". Click on this folder to find your new feature layer.
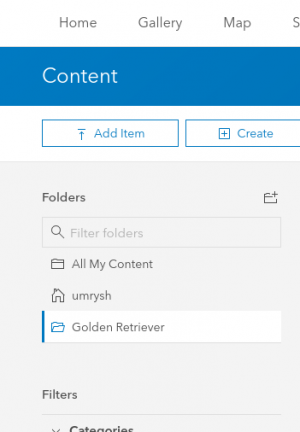

Click on the name of the feature layer to open it.
If you are wanting to make a public map that you can share with your customer please continue with the instructions on the Create public map page.
To view your data click on the button to "Open in Map Viewer".
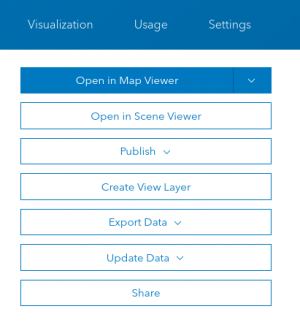
This will open your data in the online map viewer. It will open the Style menu on the left, just click cancel at the bottom or else you will lose the custom utility pole icons we have added for you :)
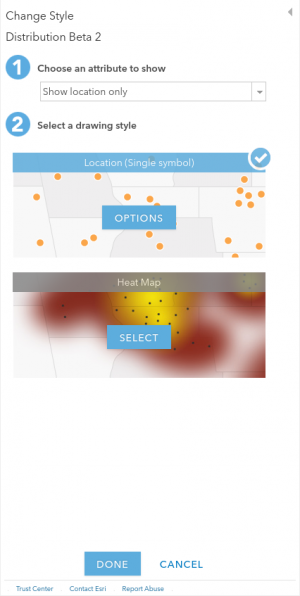
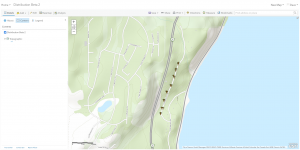
You should now see your data plotted on the map. You can click on a pole icon to bring up a pop-up of all your collected data.
