Create public map: Difference between revisions
No edit summary |
No edit summary |
||
| Line 26: | Line 26: | ||
[[File:ArcGIS - layer legend menu.png|thumb|none]] | [[File:ArcGIS - layer legend menu.png|thumb|none]] | ||
You can also add labels to the map by opening the same menu and selecting "Create Labels". | You can also add labels to the map by opening the same menu and selecting "Create Labels". | ||
[[File:ArcGIS labels.png|thumb|none]] | |||
Select the data you wish to show as the labels from the dropdown list titled "text". Click the check box to add a halo around the text and then click OK. | |||
[[File:ArcGIS poles with labels.png|thumb|none]] | |||
The next thing you may want to do is change the basemap to "Imagery with labels". You can do this by clicking on the button titled "Basemap". | |||
[[File:ArcGIS change basemap.png|thumb|none]] | |||
Now lets save the map before we share it. Click on the button titled "Save" and then click on "Save" again. | |||
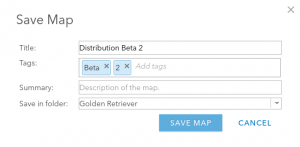
Give your web map a name, fill in any other details and then click on "SAVE MAP". | |||
[[File:ArcGIS save web map.png|thumb|none]] | |||
Revision as of 21:00, 20 January 2020
Before working through the following steps it is assumed you have already completed the steps outlined on the Export_to_ArcGIS page for getting your data from Golden Retriever into your ArcGIS Online account.
Once you have your data exported to your ArcGIS account open the feature layer. Before we create a public version of the data we need to create a "View Layer" of of feature layer. If we proceed without doing this additional step then anyone with access to the public web map will be able to edit the map. Usually when you are providing a public web map link to a client you only want them to have a read-only view of the data.
Please note that if you perform another export from the Golden Retriever Admin portal your feature layer will be overwritten but your view layer will not be. This means that each time you push and update you will need to delete and re-create your view layer and then re-add it to your public web map.
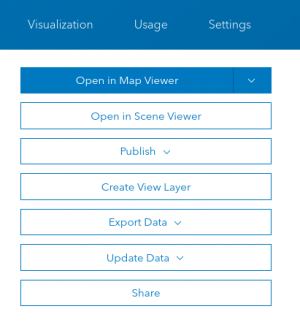
Click on the button titled "Create view layer"
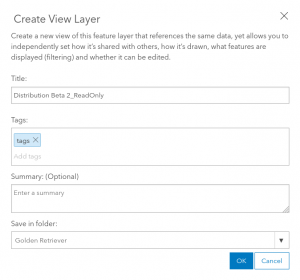
Give the new layer a new title and click on "OK to save it.
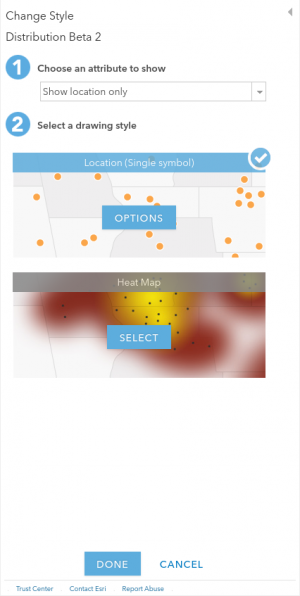
Once the view is created click on the button titled "Open in Map viewer". If the style menu appears on the left-hand side, hit cancel at the bottom or else you will lose the custom utility pole icons we have added for you :)
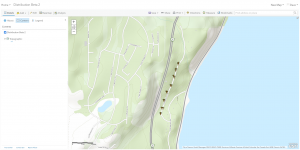
You should now see your data plotted on the map. You can click on a pole icon to bring up a pop-up of all your collected data.
Next we can rename the layer in the legend by clicking on the three dots under it's name and selecting the option "Rename" from the menu that opens up.
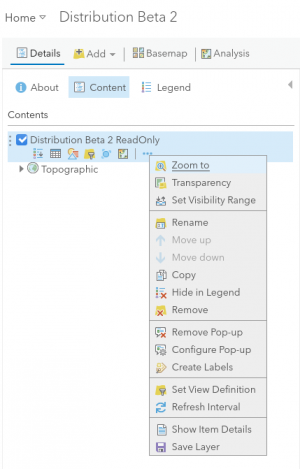
You can also add labels to the map by opening the same menu and selecting "Create Labels".
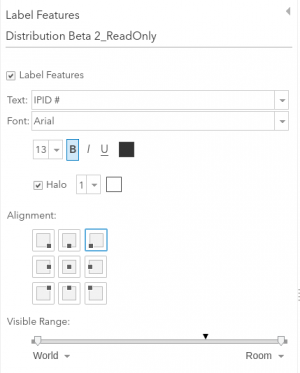
Select the data you wish to show as the labels from the dropdown list titled "text". Click the check box to add a halo around the text and then click OK.
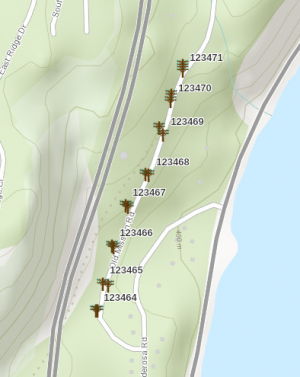
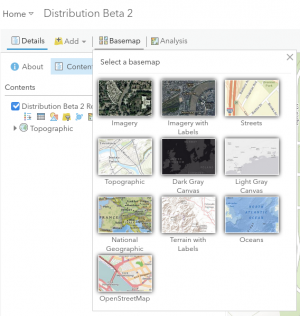
The next thing you may want to do is change the basemap to "Imagery with labels". You can do this by clicking on the button titled "Basemap".
Now lets save the map before we share it. Click on the button titled "Save" and then click on "Save" again.
Give your web map a name, fill in any other details and then click on "SAVE MAP".
